Pikart Base Plugin is a fundamental part of Ombra Theme as it allows you to quickly build professional pages due to its easy-to-use and intuitive tools. The features it comes with work in tandem with Ombra Theme options.
The plugin extends the Ombra Theme functionality with the following elements:
- Shortcodes
- Portfolio tools, also including Project Section in Theme Options
- Google Services
- Social Services
- Widgets (Pikart Recent Projects, Pikart Social Links)
- Wide Menu option for Navigation Menus
If Shortcodes, Widgets and Portfolio tools are properly described in specific sections of Ombra documentation, the other features of Pikart Base Plugin are detailed below with appropriate explanations.
Google Services
There are two types of Google Services that Pikart Base uses in order to enhance the existing theme features: Location and Analytics services. Each of them requires specific data from Google in order to make them working on Ombra.
Location
This section allows you to manage the map, that could be generated with Map shortcode. You can display on the Google Map as many addresses as you need to pin on it. The following options are available:
- Pin image — choose an image to be used for the pins on Google Map. The png format is recommended
- API Key — in order to use Google Maps you must authenticate your site with an API key. As of June 2016, the key is a requirement from Google that is necessary in order to make the map on your site functional. Follow the instructions and Get the API key.
Analytics
In case you’re using Google Analytics to monitor your site traffic, enter your account ID here. For more information on this, see the link.

Social Services — as the name already says it — are intended to connect and adapt Ombra Theme to diverse social networks. There are two types of Social Services: Share and Likes.
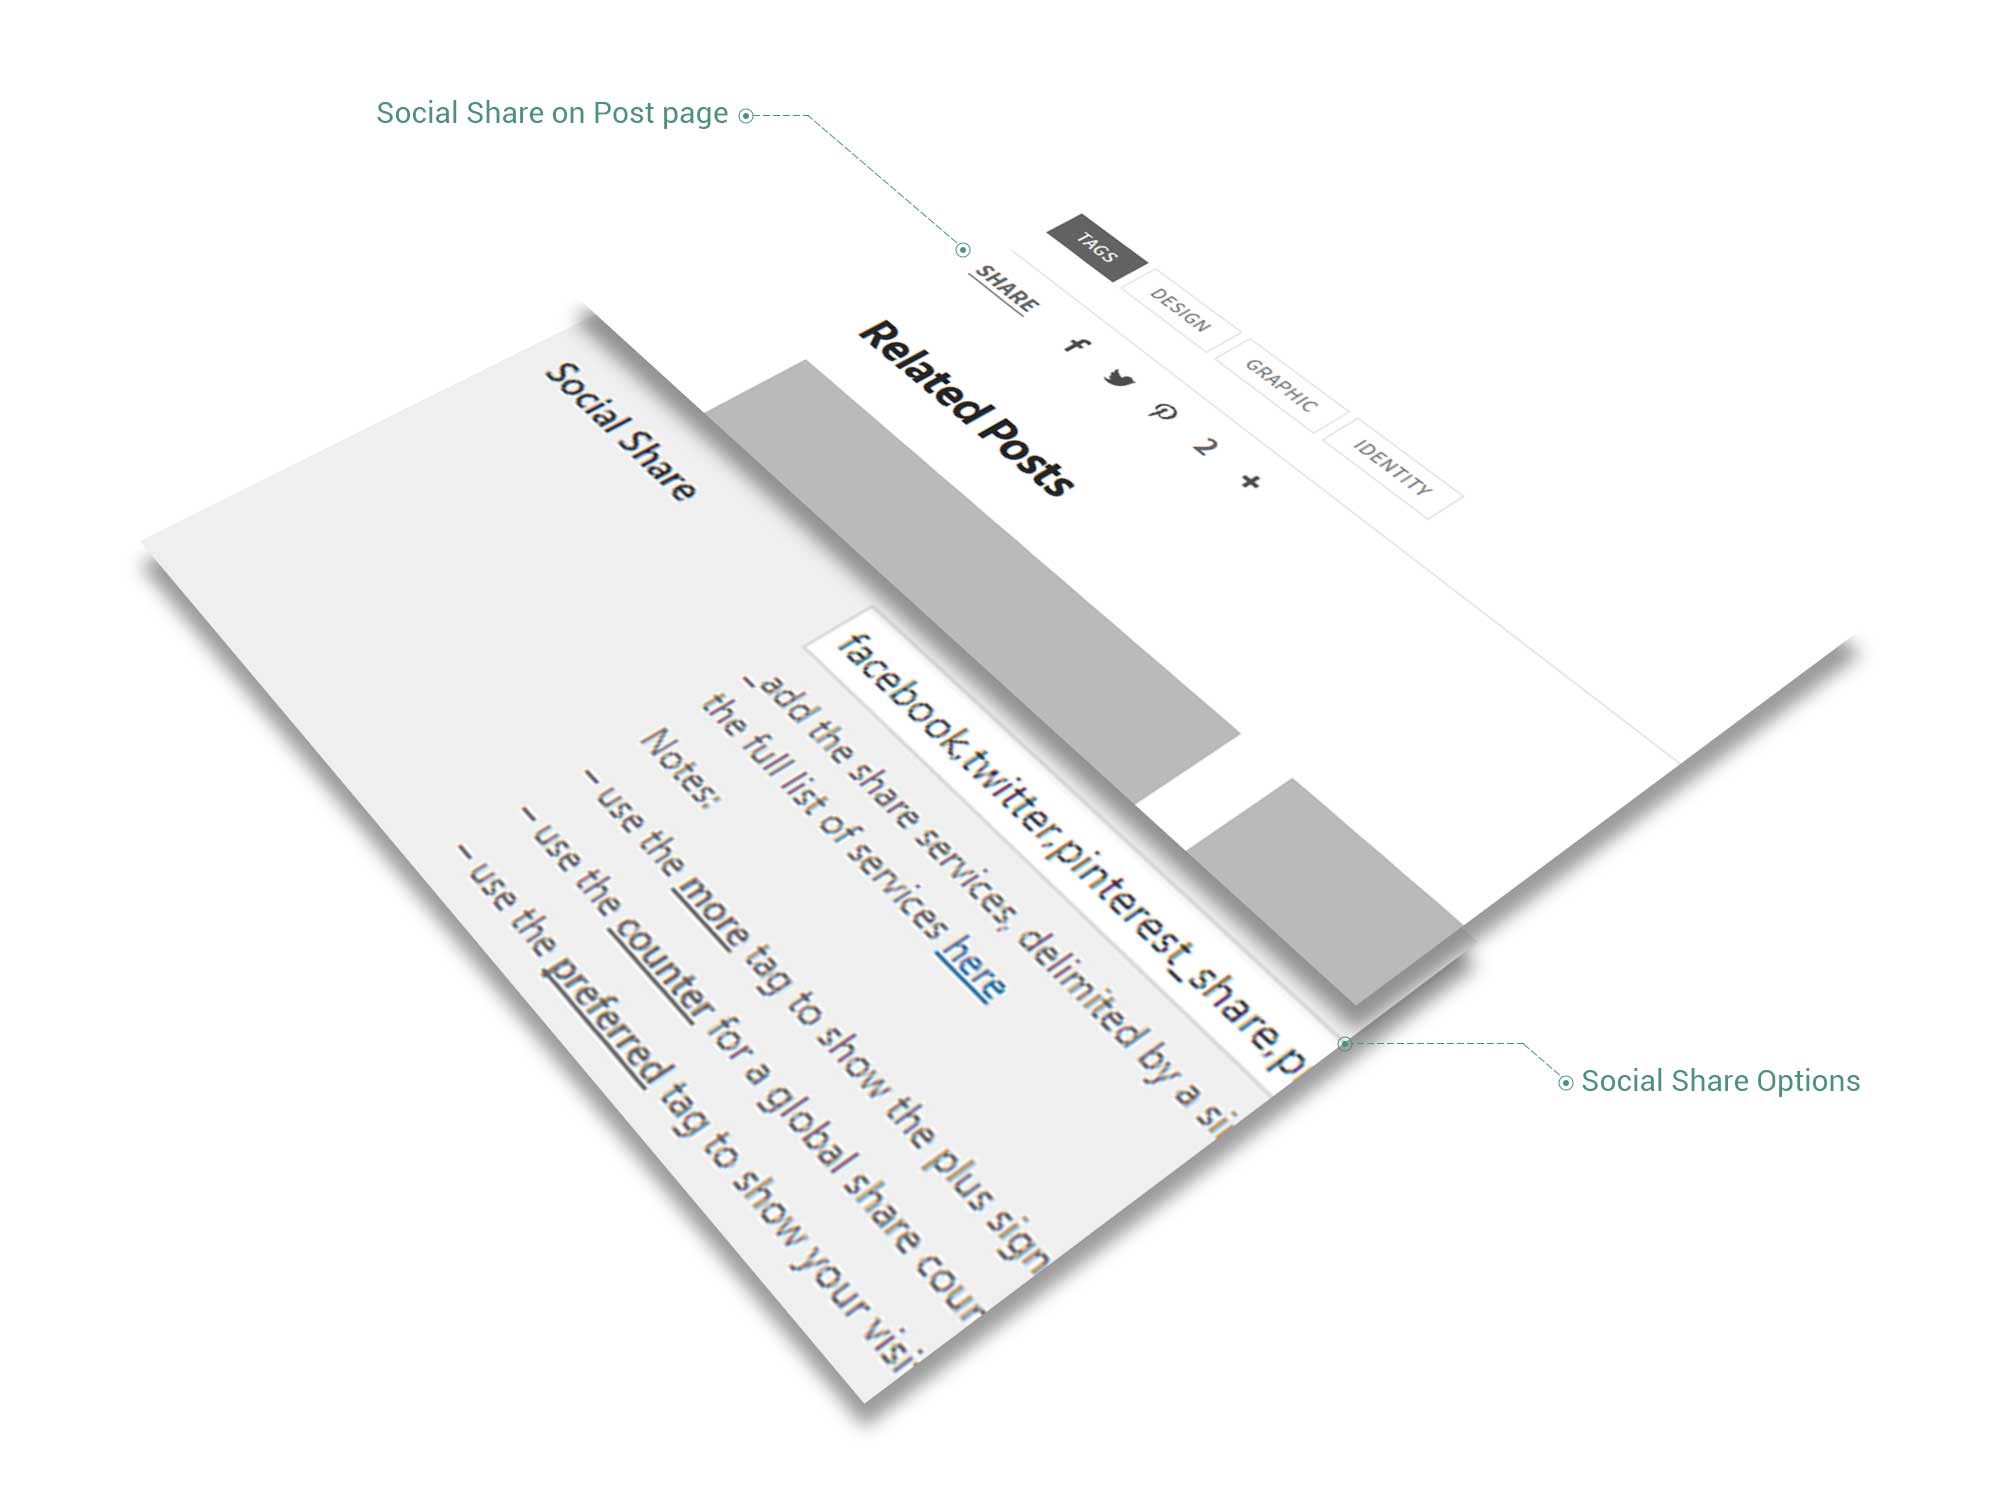
Share
This section enables your viewers to share your posts, pages or projects via social networks. Encourage your visitors to spread your content across a large range of social networks and drive more traffic to your site.
Social sharing experience is possible due to AddThis, which offers quite a large number of supported social services, each identified by a specific, lowercase name that you can find on this list.
Besides those social networks, there are another three unique buttons that you can use:
- The more button that will open up a popup where people can search for their particular service.
- The counter button is a global share counter that counts how many times your page was shared
- The preferred button type that displays your visitor’s favorite social services, saving him the time of finding them. This feature allows you to get to a wider audience since there are many social services nowadays, in different languages, and you cannot cover them all. You can have multiple preferred buttons, and they will be filled with various social services automatically. You can find more about this here.
Example of how to insert Social Services below:
facebook,preferred,preferred,counter,more
On the page it is displayed, there will be the following icons: facebook icon, next two icons depend on visitor most used social networks, the counter button and the more button.
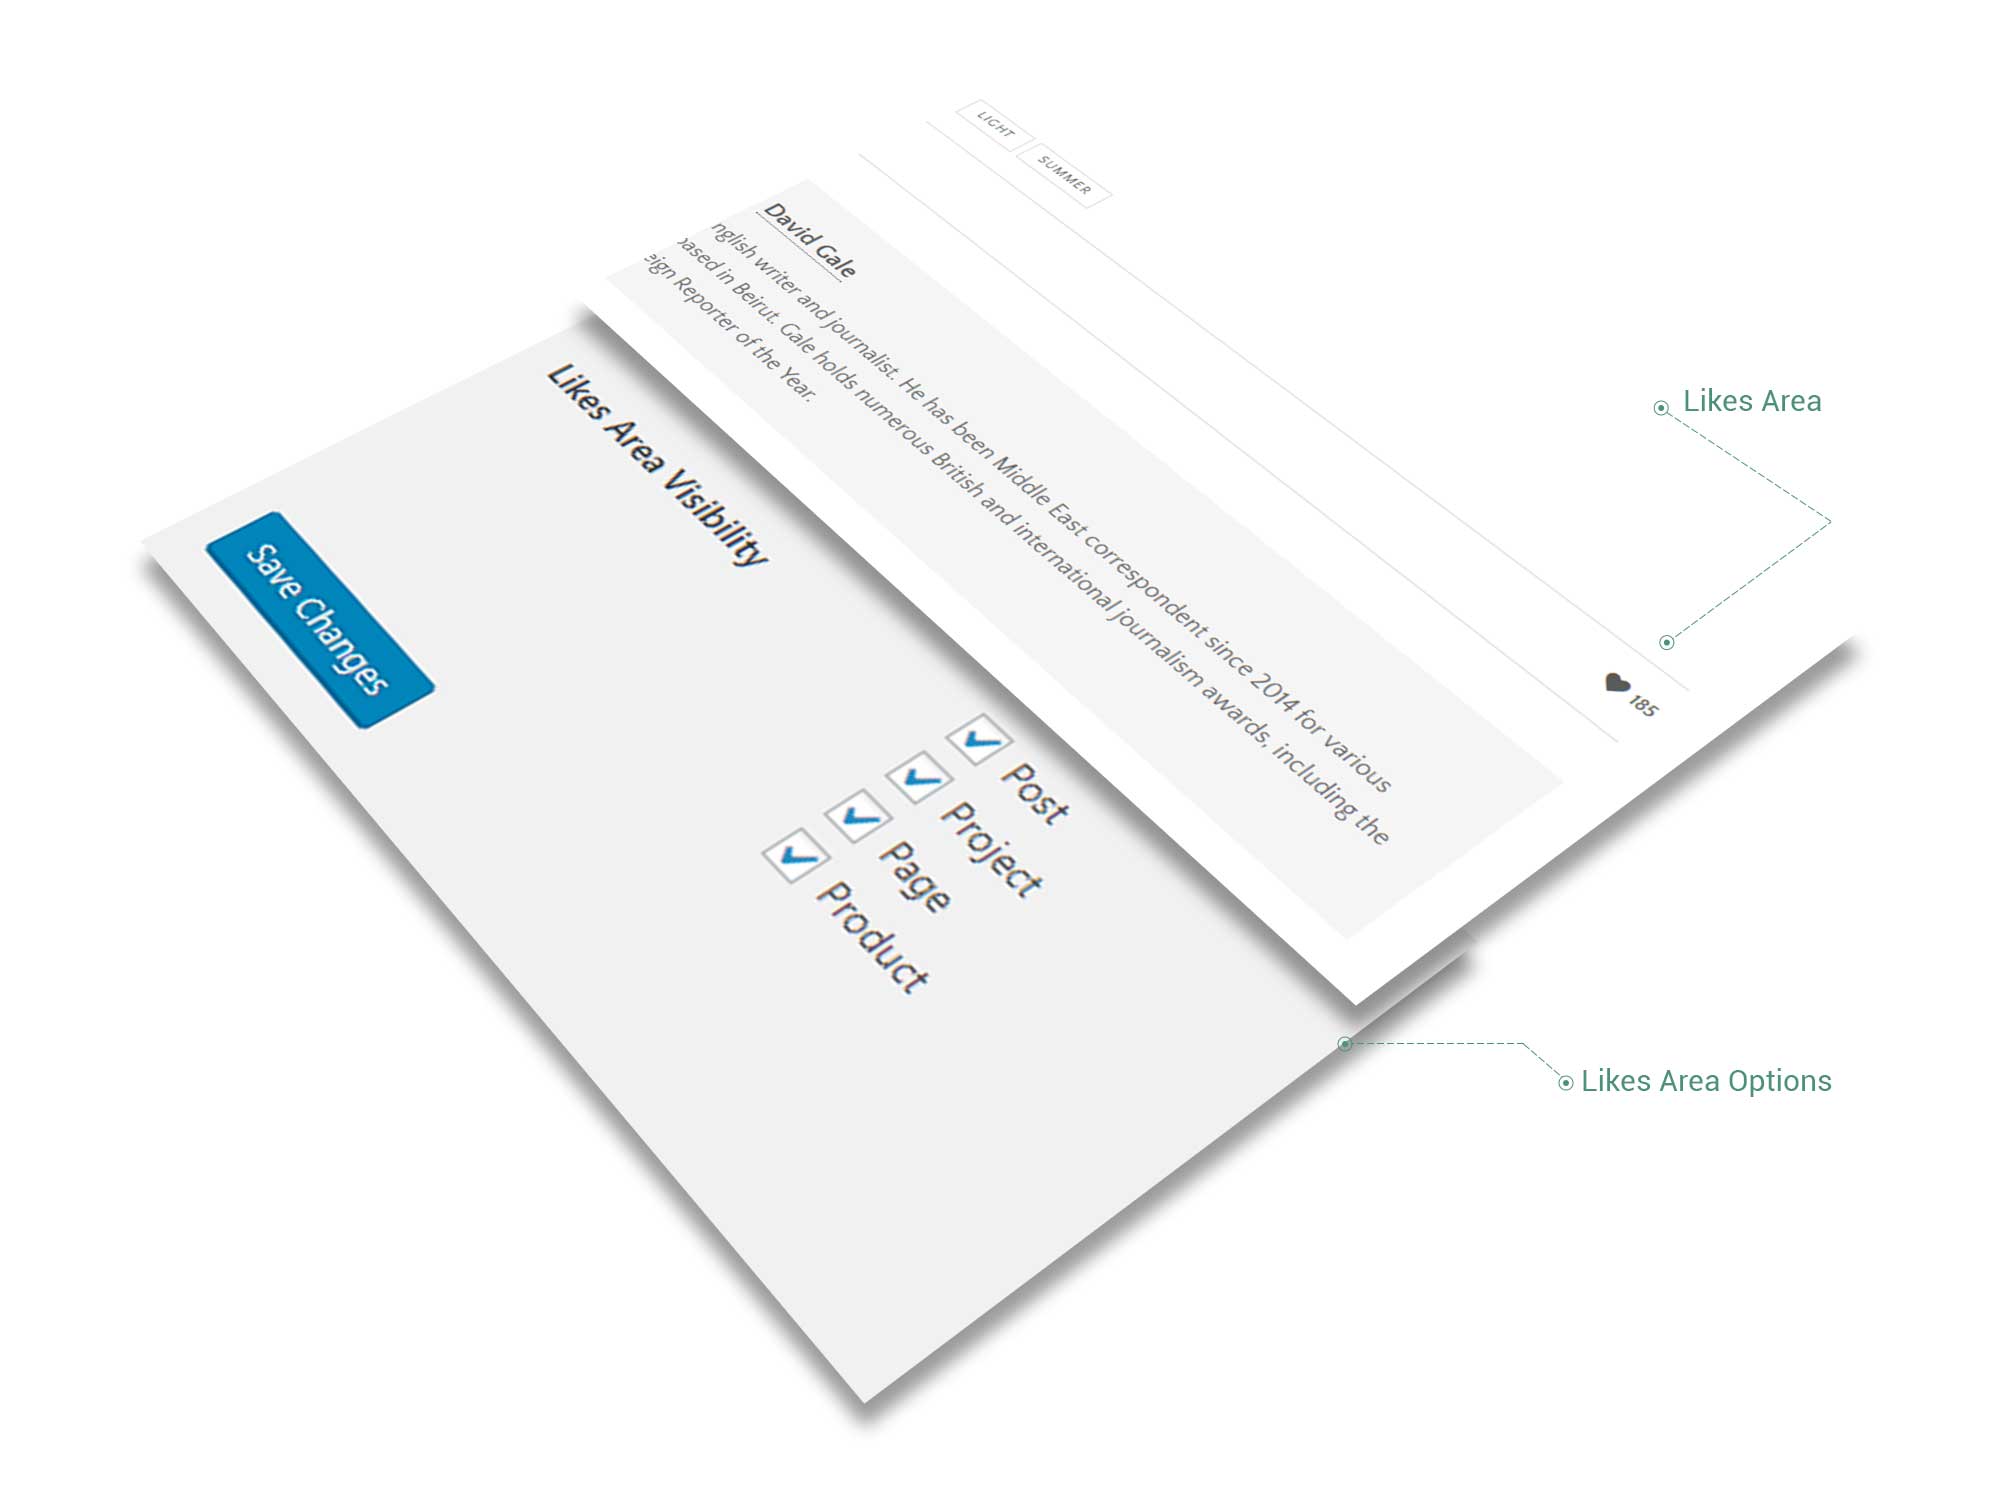
Likes
Likes Area was conceived in a similar way the Facebook Likes work and is intended to encourage your site’s visitors to interact with site content. You can add Likes functionality for Posts, Pages, Projects and Products.
The menus represent an important tool for an easy navigation through your site, that is why we recommend to explore all its locations.
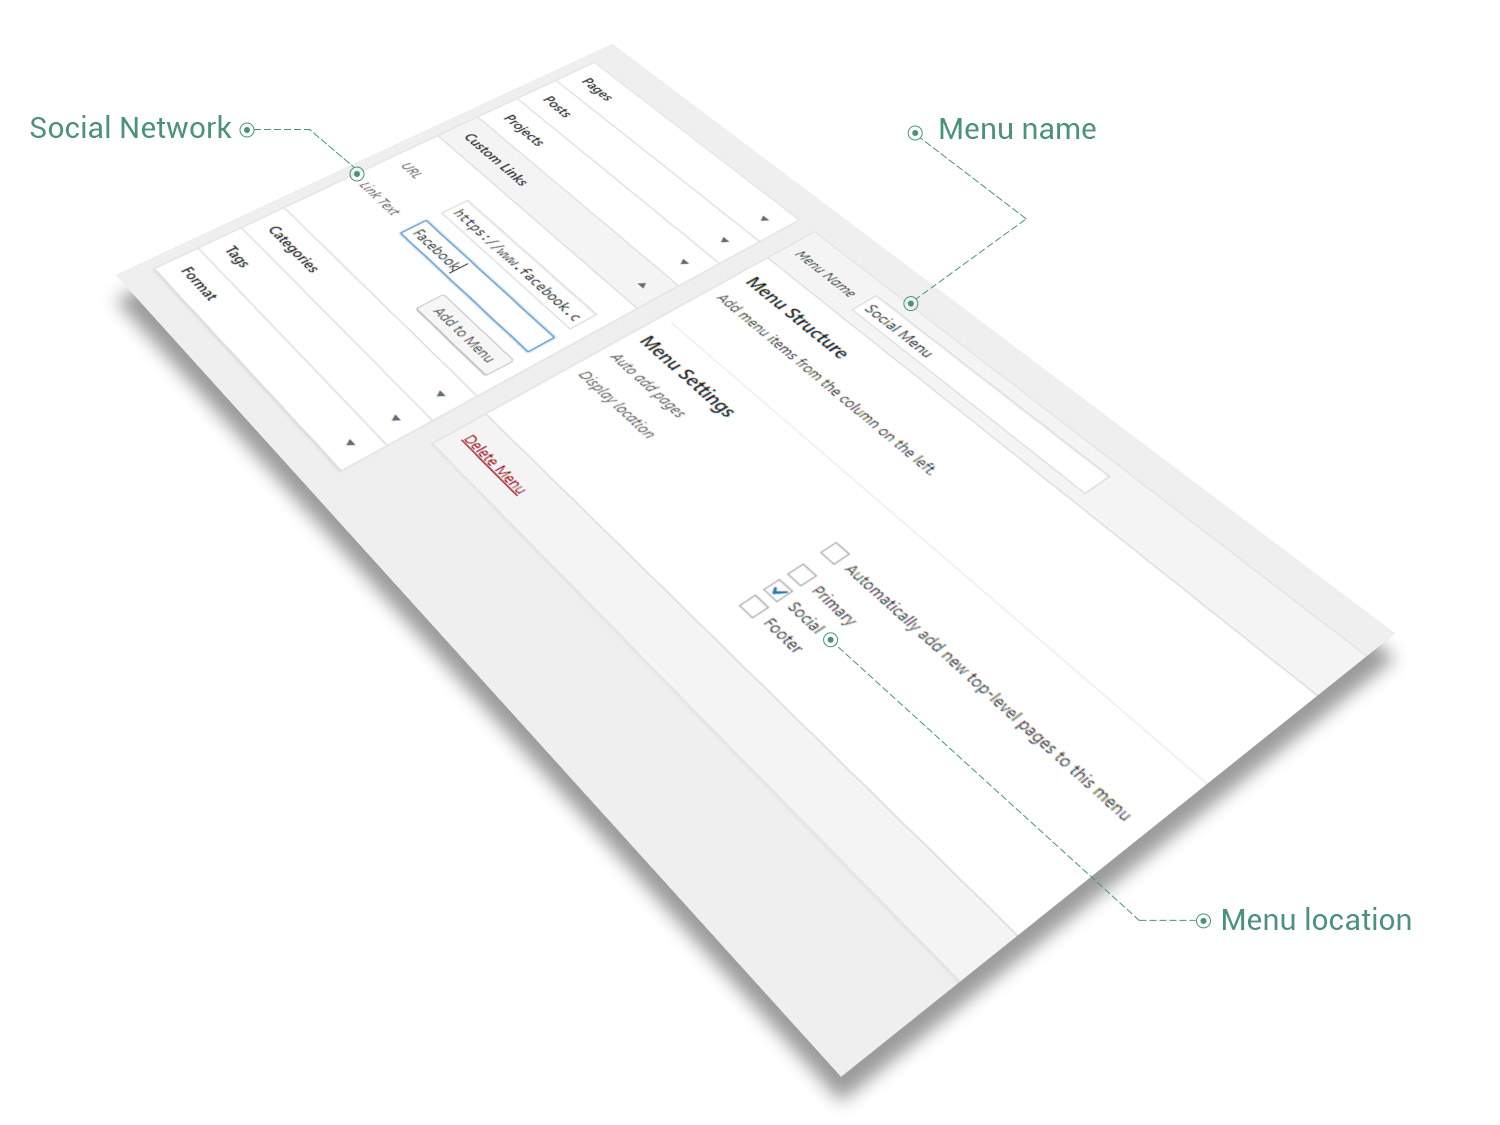
The Primary Menu will be always in your Site Header and it is the most seen part of your site. The Footer Menu, located in the footer of your site, usually contains just the critical items necessary to navigate, like Home or Contact pages. The last one is Social Menu, where you will be able to insert Custom Links referred to social websites (like Facebook, LinkedIn, Pinterest, Twitter etc.)
Keep in mind In order to set up a Social Menu, you need to do the following steps:
- In your Dashboard, go to Appearance → Menus to bring up the Menu Editor
- Select Create a new menu at the top of the page
- Enter a name for your new menu in the Menu Name box and click Create Menu button
- Go to Menu Settings at the bottom of page and find Display location field where you choose Social
- Find Custom Links on the left side, enter the link of the social network (for example, https://www.facebook.com) in the URL field and the name of the social network at Navigation Label (for example, Facebook), then click on Add to Menu button. Follow this step for as many social links you need.
- Click on Save Menu button
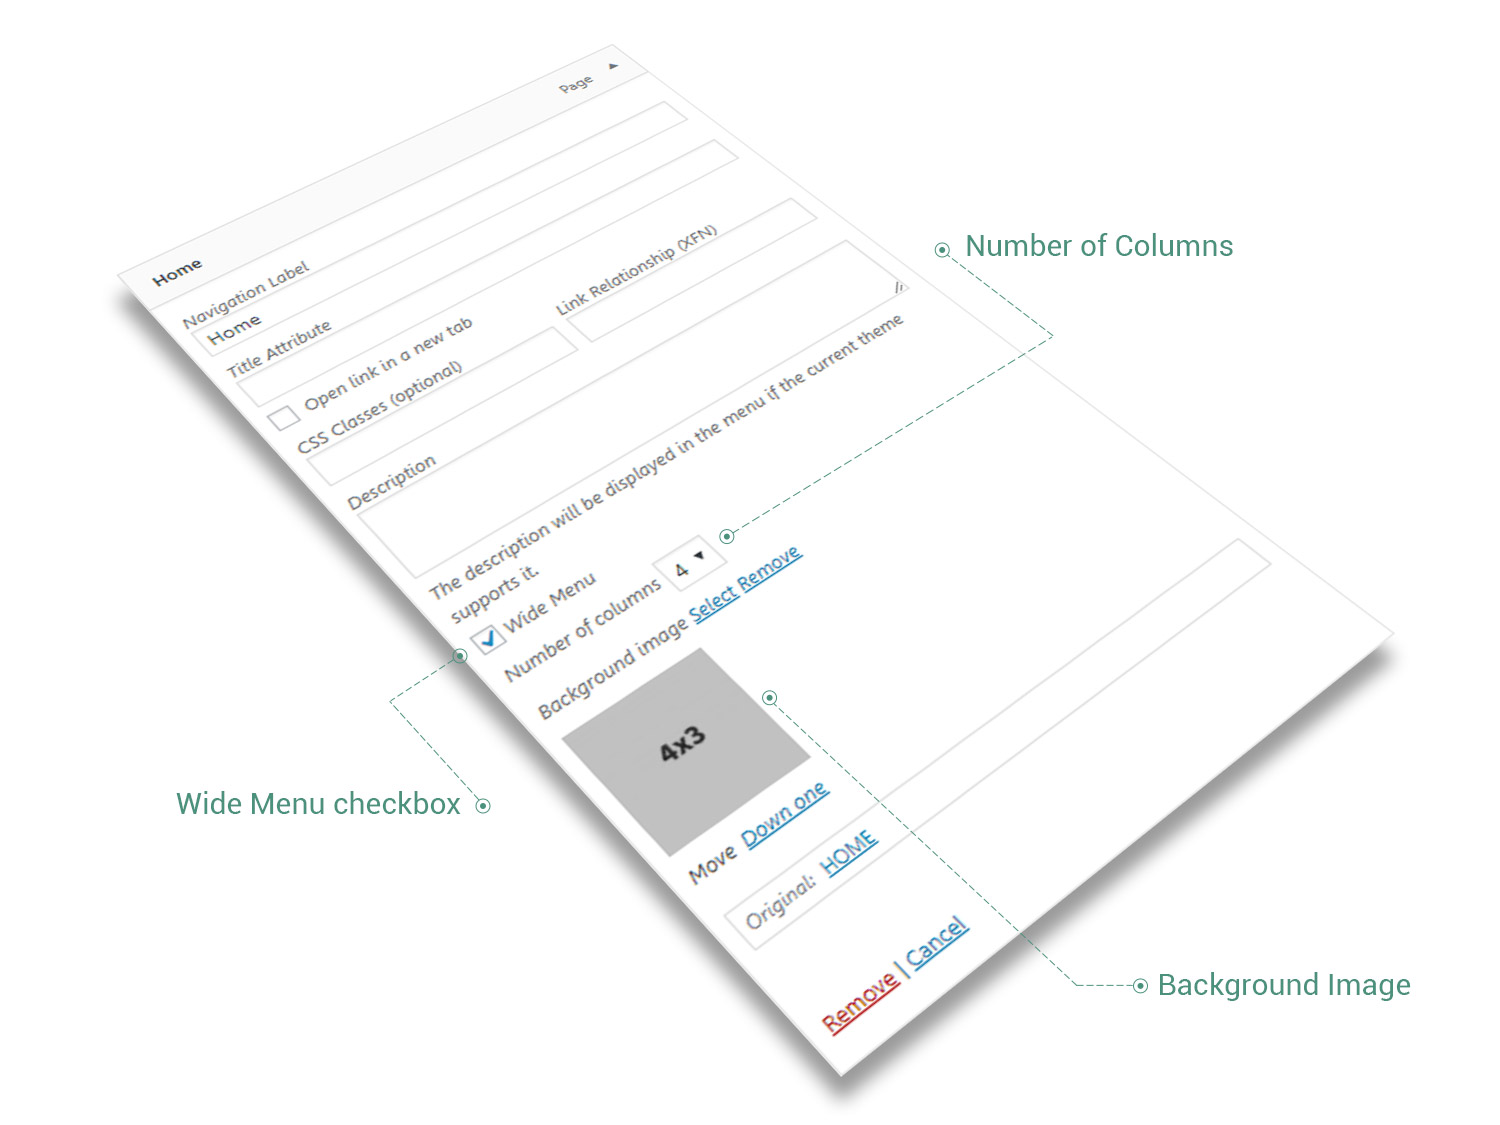
Beyond the WordPress basic functionality of its menus and various locations, Pikart Base comes with a new feature represented by Wide Menu.
The Wide Menu options extend the basic functionality of a WordPress menu. Wide Menu allows you to customize the submenus of Primary Menu. After enabling the Wide Menu checkbox, the first level of submenus are extended up to the site width. There is also couple of extra features conceived to enhance Wide Menu behaviour (that do work just when Wide Menu is activated and Primary location is selected):
- Number of columns — choose how many columns of submenus to appear inside the Wide Menu item: 1, 2, 3, 4, 5 or 6
- Background Image — choose an image to be used as background for Wide Menu item
- Custom Widget Area — it is available for children of Wide Menu items. In order to add a Widget Area, you need to go to Appearance → Widgets and add a new sidebar at Add Custom Sidebar section. After doing so, you will be able to set up a Custom Widget Area inside the children of Wide Menu items.
Social Services