We strived to make OMBRA international to help you customizing your site as quickly as possible.
That is why the theme comes with MO & PO files included — where you can get translations for both the Admin Dashboard and the site itself — and compatibility with well-known WPML plugin.
Summary
Localization
Localization describes the subsequent process of translating an internationalized theme like OMBRA theme is. To find out more about installing languages on WordPress, please see the link.
So, in case you want to translate Ombra to another language, different from those already coming with theme (French, Portuguese, Spanish), you should use a child-theme and follow the next steps:
- Go to /languages/ directory located in theme folder — you will see there the files related to translations — .mo and .po files – and find ombra.pot
- Copy ombra.pot file, then go to ombra-child folder, create /languages/ directory and paste there ombra.pot file
- Rename both the name of file — according to your desired language (for example, from ombra to es_ES) — and its extension (from pot to po). The name of your .po and .mo files has the form ll_CC. Here ll is an ISO 639 two-letter language code, and CC is an ISO 3166 two-letter country code. For example, for German in Germany, ll is de, and CC is DE. You might think that the country code specification is redundant. But in fact, some languages have dialects in different countries. For example, de_AT is used for Austria, and pt_BR for Brazil. The country code serves to distinguish the dialects. Read more about Languages Codes and Country Codes.
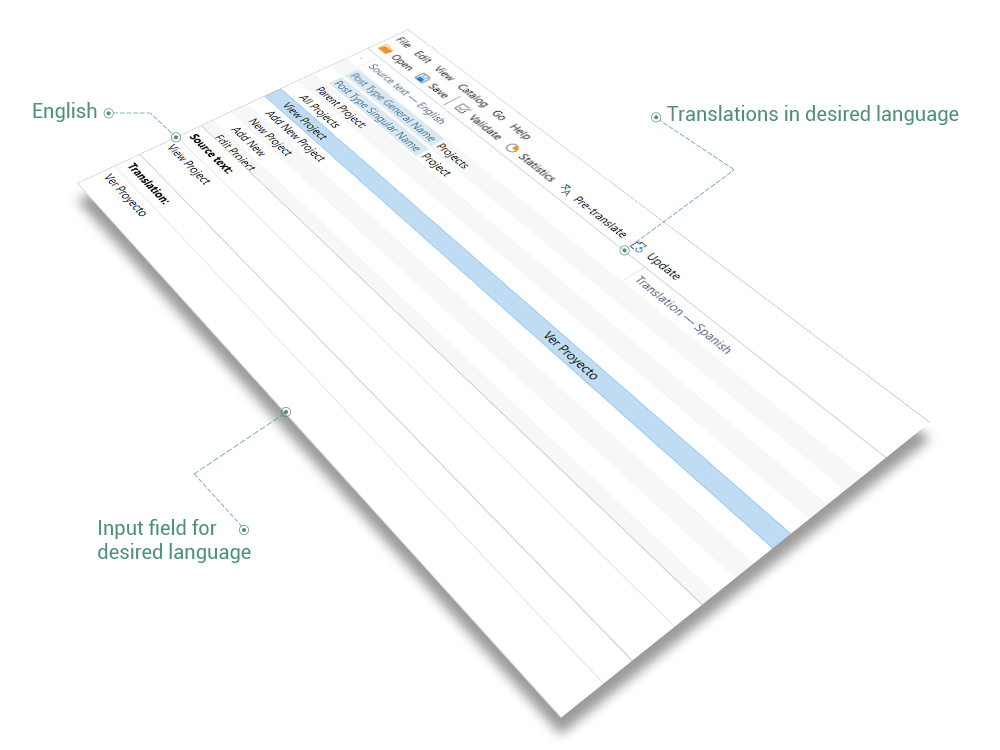
- Open the new renamed file with Poedit (free software that you need to install in order to easily edit .mo and .po files) and you will see the list of all English phrases – you need to translate in your desired language – on the left side, and all the translations – if present – on the right side. In order to translate, left-click on the English phrase and you will see at the bottom of the window two boxes: the first one – with English phrase – and the second one – initially empty – the place you should enter the translation for your language. Make all your translations by this way.
- Hit Save button and, right in that moment, you will automatically create the .mo file for your language.
- Go to child-theme folder, find functions.php file, open it and paste there — right below the existing code in the file — the following lines:
add_action( 'after_setup_theme', function () {
   load_child_theme_textdomain( 'ombra', get_stylesheet_directory() . '/languages' );
} );- Save functions.php file and close it.
- Compress your child-theme folder as a ZIP file and upload it to your WordPress Dashboard.
- In WordPress Dashboard, navigate to Settings → General, choose your language from Site Language box and click on Save Changes. Also, you may need to go to Users → Your Profile, find Language field, choose your language and click on Update Profile. That’s it!
WPML Plugin
OMBRA empowers you to translate all the theme elements effortlessly with WPML plugin integration. WPML is a premium plugin, that is not included in theme package, and is well documented by their own developers.
For a better understanding of WPML plugin, initially, you should follow the Getting Started Guide that will help you in setting up WPML in a few minutes. Then, you will want to refer later to some of its subtopics, such as Theme and Plugin Localization and String Translation.
In a short, these are the main steps you need to follow to get started:
- Install and activate the core WPML plugins (WPML Multilingual CMS, WPML String Translation, WPML Translation Management) and other WPML plugins that may depend on them.
- Set up WPML from the dashboard, by going to WPML tab. Initial simple three-step setup is self-explanatory, asking you to choose your default language, a set of active languages, and a language selector.
Posts, Pages and other Post Types
In order to translate Posts, Pages, Projects or Albums, you need to navigate to their items and you will see columns — for each active language — with “+” sign to add translation.

Now you will be able to translate your page by setting the translated title and body and then clicking on the Publish button.
Note that you can click on the Copy content from … or Overwrite with content options found on the language metabox to the right:
- The Copy content from … option will automatically copy the content from the primary (default) language to the translated language, giving you the option to translate the copied content.
- The Overwrite with content option will always set the translation of that page to be a duplicate of the original page (in the default language). You can disconnect the page to be translated independently by clicking on Translate independently, found on the language metabox.
Post slugs
WPML lets you use unique URLs for custom content in different languages. This includes translating the post slug, as well as the name of the custom post type.
URLs for custom post types include the name of the post-type and the page name. Typically, custom post types in different language will look like:
- /houses/my-green-house/
- /casas/mi-casa-verde/
The first part of the URL, in bold, is the post type. The second type is the page name.
In order to translate custom posts slugs, follow these steps:
- Go to WPML → Translation Management → Multilingual Content Setup and scroll down to Custom posts slug translation options section. Confirm that the Translate custom posts slugs (via WPML String Translation) option is checked.
- Scroll down to Post Types Translation section and confirm that your custom post type is set as translatable, uses different slugs in different languages and has the proper slug translation (make sure that each slug is assigned to the proper language, checking the language flag next to each slug)
- Go to Settings → Permalinks and save your permalinks structure again to make sure that rewrite rules cache is flushed.
For more information, please check the translating page slugs tutorial.
Menus
With WPML you can easily synchronize between your languages’ menus. For more information, please check the full translating menus tutorial.
Widgets
You easily translate your Widgets via String Translation screen, that requires WPML String Translation being installed. For more information, please check the full translating widgets tutorial.
Translating the theme other strings
To translate the theme strings you will need to scan your theme for strings, as this will register the strings for translation on the string translation screen.
This can be be done by following the steps below:
- In your WordPress dashboard, go to WPML → Theme and plugin localization.
- Find Select how to translate strings in the theme and plugins section, where you should choose Translate the theme and plugins using WPML’s String Translation. When you select Don’t use String Translation to translate the theme and plugins, you simply tell WPML not to allow editing these translations using the String Translation module.
- Click on the Scan the theme for strings button, this will register the theme texts for translation on the string translation screen.
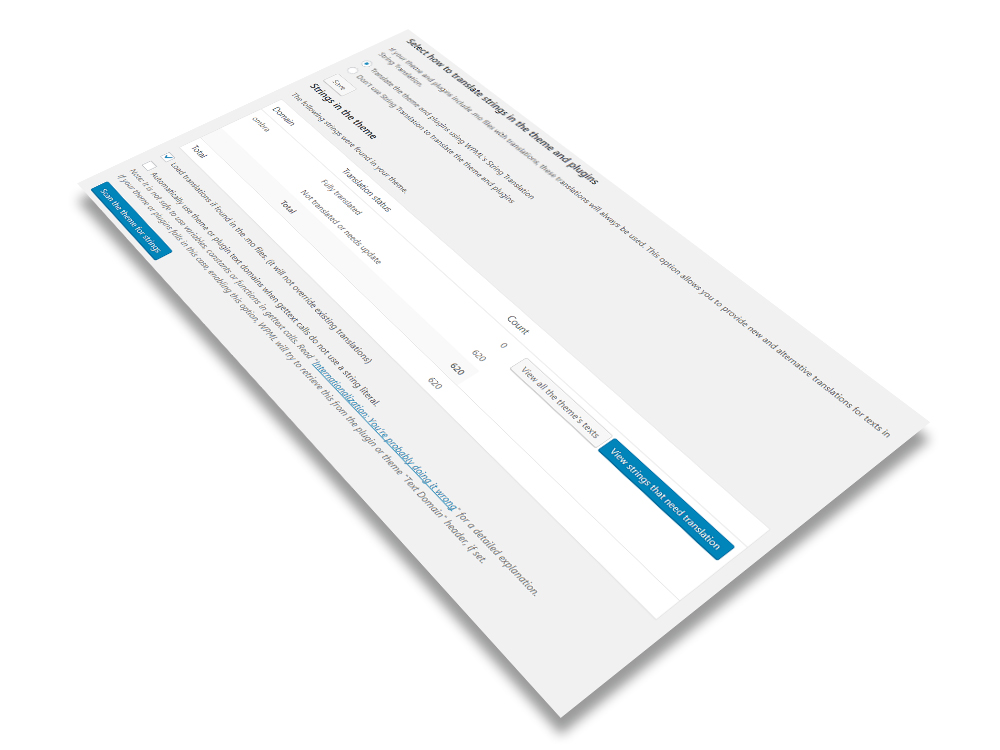
- Now you can navigate to WPML → String translation and filter the strings by Translation needed to see which strings are missing translations, or select a specific text domain. You can also search for a specific string by typing it in the Search for field and then clicking the Search button. Once you find your string, click on translations and add your translated text. Then, choose the Translation is complete option and click on Save.
Theme Options
Translating theme options can be done by navigating to WPML → String translation. For more details about Theme Options translation, please see the link.